

Home Made Easy – Summer Time
 |
Follow @BuildersFan |
Going into summer there is no reason why you shouldn’t be growing your own strawberries, creating a citrus lime tray for your summer catering or designing an outdoor outdoor projector screen stand to enjoy on those summer nights.
Part 1 – Gardening (Tanya)
Growing strawberries at home
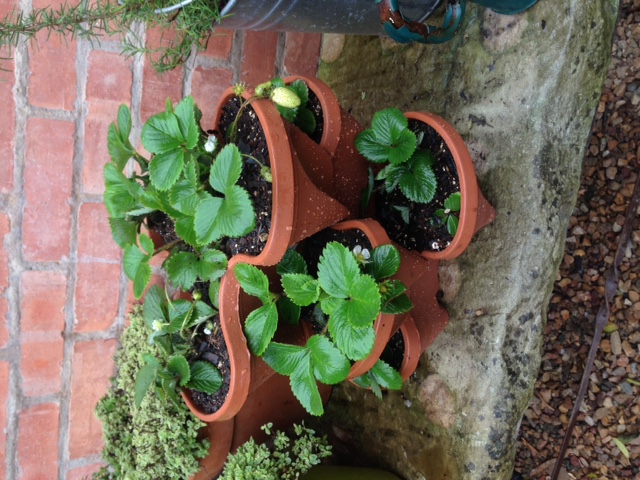

You will need
| Materials | Tools |
| Stackable container | Hand trowel |
| Strawberry plants | Trug for mixing soil |
| Potting soil | |
| Bonemeal | |
| Slow release fertilizer pellets | |
| Palm peat / coconut husk | |
| Vermiculite |
Steps:
- Start by preparing your potting soil. Use good quality potting soil and mix in two handfuls of slow release organic fertilizer, coconut husk, two handfuls of bone meal and two handfuls of vermiculite.
- Make sure the container you are using has sufficient drainage holes. Add drainage pebbles at the bottom of your container, or make use of some weed cloth to stop the soil from falling through the holes.
- Fill the container about 1/3rd with potting soil mixture.
- Remove strawberry plant from bag or pot and transfer to the prepared container. Continue to place the rest of the plants and fill up the gaps with more of your potting soil mixture.
- Water well and enjoy your strawberries!
Watch the video
Part 2 – Décor (Elle)
Citrus Lime Tray

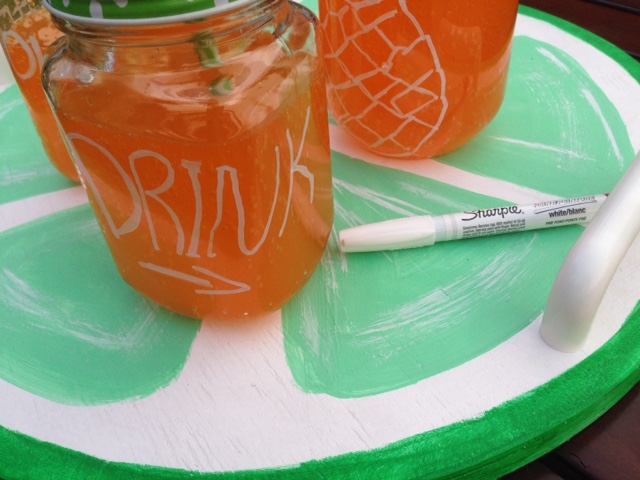
Bring a touch of fun to your summer catering by making your own colourful citrus-look serving tray…
You will need
| Materials | Tools |
| Square ply-wood | Measuring tape |
| 2 x Cabinet handles | Pencil |
| Paint Brush | Sander |
| PVA Paint (Craft paint) | Router or Jigsaw |
| Clear sealant or wax | Power Drill |
Steps:
- Determine the size of the circle you want for the tray and make the necessary measurements to transfer to the piece of wood. If you are using a Jigsaw, transfer the radius measurement of your circle to a piece of string, centre it and then on the other end with a pencil trace out the circular shape.If a router is being used (like in this project), find the centre of your wood and drill a small hole for the point of the “parallel” guide rail to fit into, as this acts as the turning point to move your router on while in use.Find the radius measurement of your desired circle size and transfer that measurement to the guide rail from centre point to the router bit and secure to the router. Now the measurement of the radius is locked and it is time to start cutting.
- Insert a “straight cut” router bit into the collet of the router and secure. Because the wood is thick, one cannot cut the circle out in one go, that would risk damaging the router and router bit. It is advisable to cut in increments.Make use of the depth adjustments on the side and adjust to another depth setting after each cut into the wood. Start with the shallow depth setting and work your way to the deepest depth setting.Always wait for the router to reach full speed before “plunging” into the wood and then moving your router to cut. Make sure router is facing and cutting in the right direction.
- After the perfect circle has been cut, give it a good sanding before painting. Wipe down or dust off the surface before the next step.
- We painted this tray in the colours of green and white, to give that “lime citrus” look.Start by painting the base white and then continue to paint the rim in a darker shade of green. For the interior “parts” of the fruit, opt for a lighter shade of green.
- Using a power drill, drill holes on either side of the round tray to attached the cabinet handles. These act as the handles for the tray.
- Seal the project with a clear sealant or wax.
Watch the video
Part 3 – Workshop (Ryan)
Outdoor projector screen stand
Entertaining can be at its best if you make the most of the great outdoors!
| Materials | Tools |
| Wood | Mitre saw |
| Curtain blind | Sander |
| Screws (decking / rust-resistant) | Drill |
| Glue | Pocket-hole jig |
| Sand bags | |
| Stain | |
| Solar lights x2 | |
Steps:
- Determine the appropriate size of the frame for the projector screen;
- Considerations include size of available outdoor space
- Size of desired projector screen
- Prepare the frame by cutting the outer frame pieces to size:
- 2x vertical uprights @ 1800mm
- 5x horizontal lengths @ 1600mm
- 5x decorative roof slats @ 1000mm (optional)
- 2x horizontal feet @ 1000mm (plus 4x braces at required length)
- Start assembling the frame to create a rectangular structure by securing the 2x vertical uprights to 1x horizontal length to form a ‘U’ shape.
- Cap the 2x vertical uprights by securing a horizontal length to the top; this will provide protection to the projector screen from the elements.
- Secure 2-3 horizontal pieces at the base of the projector frame to define the frame.
- Attach the feet to the base and secure with 2x braces on each side for added stability.
- Secure the decorative roof slats using a pocket-hole jig and screws.
- Sand the entire project using medium grit sandpaper including 1x horizontal piece that will form the front fascia plate, behind which the projector will be mounted and discreetly hidden from sight and the outdoor elements.
- Once sanded, paint or stain to the desired colour to suit your outdoor decor theme.
- Attach the projector screen or block out blind and secure the front fascia plate.
- Optional: add decorative lighting to the 2x uprights for added ambience and enjoy
- Place in your desired location and add the sandbags to secure the structure.

